The XUV 550 I'm working on is a 2012 model. I don't know if other year models changed. Also most of the information for the bolt sizes I got from Gator Forums, but instead of just linking to their content I want add some information of my own. For those of you who own or are working on a John Deere XUV 550 you should know a special tool from John Deere is needed to remove the centrifugal clutch. The tool is called a Clutch Puller and the John Deere part number is JDG1641 (see photo below). The tool retails for around $40. I was told from reading online content that this tool is discontinued, but I believe you can still purchase a similar tool, or maybe the exact same tool from
Comet Clutches (click to visit their website). The clutch on the XUV550 is not made by Comet Clutches, but they look very similar.
If you want to save money you can make your own clutch puller tool by purchasing a 9/16-18 4" inch bolt and a 1/2-12 or 18 6" inch bolt. 9/16 and 1/2 refers to the bolt diameter and 12 and 18 refers to the number of threads per inch. 18 threads per inch is a fine thread and 12 threads per inch is a course thread. The 9/16 bolt should be fine thread, but it doesn't matter if the 1/2 bolt has fine or course threads because the threads won't be used to thread into anything. The length of the 1/2 inch bolt is what's important and the bolt should be cut to length shown in the picture below, which is 3.370 inches. If you can't find a 1/2" bolt with a shank that long I believe you can use the threaded part of the bolt, but you must cut the head off the bolt. The 1/2 bolt or shank works essentially as a spacer between the crankshaft or transmission input shaft and the 9/16 bolt as it is threaded into the clutch and tightened. Both bolts should be a high grade.
The John Deere XUV550 is fitted with a Comet centrifugal clutch. The driver clutch is attached to the engine crankshaft and the driven clutch is attached to the transmission input shaft. Both clutch parts are secured to there shafts by one bolt. To remove the driver or driven clutch remove the securing bolt and insert the shank or 1/2" bolt into the hole. Push it all the way in, then screw the 9/16 bolt into the clutch. The same hole used to secure the driven and driver clutch to their respective shafts is threaded to work with the 9/16 - 18 bolt. Tightening the 9/16-18 bolt will cause it to press against the 1/2 bolt spacer, which will pull the clutch off it's shaft. It's probably a good idea to use anti seize on the 9/16-18 bolt threads.
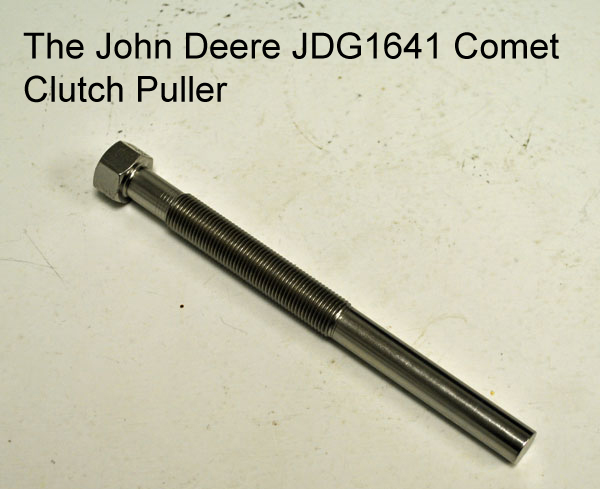
The JDG1641 Clutch Puller
Click on image to enlarge:
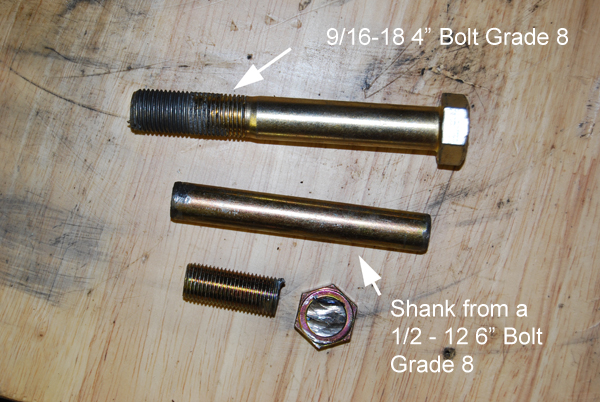
Both the 9/16-18 4" and 1/2-12 6" bolt. The 1/2 bolt has been cut and the head and threads are the 2 bottom pieces you don't need.
Click on image to enlarge
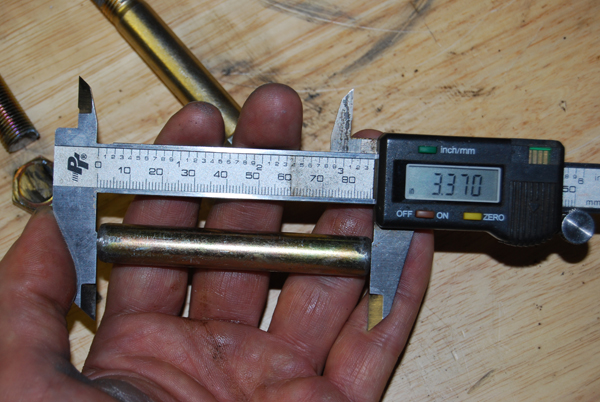
This pictures shows the length of the 1/2 bolt shank you need to remove both the Driver and Driven clutches.
Click on image to enlarge
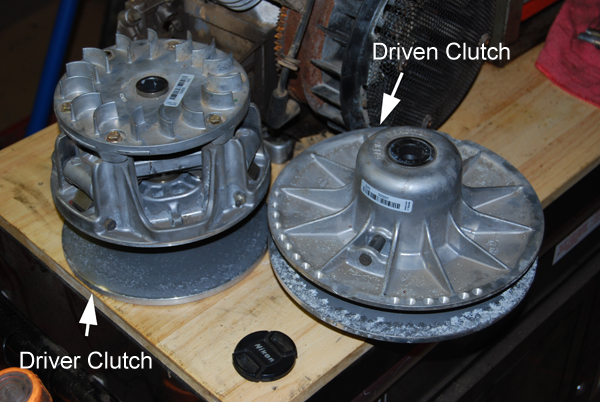
This picture shows both the Driver and Driven clutches removed from a 2012 John Deere Gator XUV550.

